How to Till a Garden: A Step-by-Step Guide for Healthy, Productive Soil
- By the dedicated team of editors and writers at Newsletter Station.
Tilling is one of the most important steps in preparing a garden for planting. Whether you’re starting a new garden bed or refreshing an existing one, properly tilling the soil loosens compacted earth, improves drainage, and creates a healthier environment for plant roots.
For both beginner and experienced gardeners, learning how to till a garden properly can make a big difference in plant growth, soil health, and overall harvest success. With the right tools, timing, and techniques, you can prepare your garden bed for a productive growing season.
Below is a simple step-by-step guide to help you till your garden effectively while maintaining healthy soil.
Step 1: Gather Your Tools and Materials
Before you begin, make sure you have the proper tools and supplies ready. Using the right equipment can make the job faster, safer, and more effective.
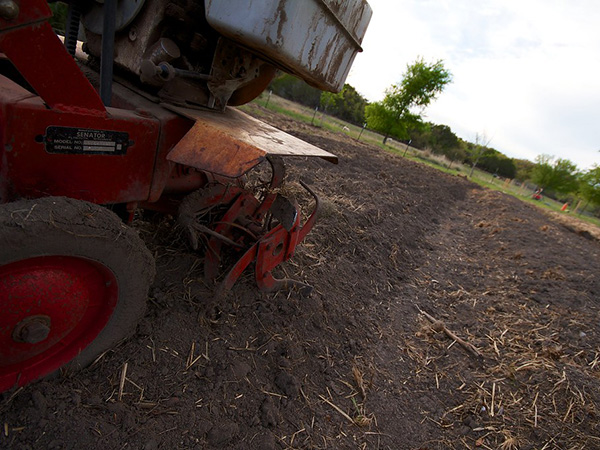
Common tools for tilling include:
Garden tiller: Options include hand tillers, electric tillers, battery-powered models, and gas-powered tillers. Choose a size based on your garden space and soil conditions.
Safety gear: Gloves, safety glasses, and sturdy shoes protect you from debris and accidental injuries.
Garden rake: Useful for clearing debris and smoothing the soil surface.
Garden hose or watering can: Moistening the soil before tilling helps make the job easier.
Compost or organic matter: Compost, aged manure, or leaf mold can improve soil fertility and structure.
Preparing your tools ahead of time helps ensure the process goes smoothly once you start working on the soil.
Step 2: Choose the Right Time to Till
Timing plays a major role in successful tilling. The best times to till a garden are early spring, before planting, or in the fall, after harvesting.
The soil should be slightly moist but not overly wet. Tilling soil that is too wet can cause compaction and large clumps that are difficult to break apart. On the other hand, extremely dry soil can be hard for a tiller to penetrate.
A simple test is to squeeze a handful of soil. If it crumbles easily instead of forming a sticky ball, it’s ready to till.
Step 3: Prepare the Garden Area
Before starting the tiller, take time to properly prepare the garden bed.
Clear the area:
Remove weeds, rocks, sticks, and plant debris from the surface using a rake or garden hoe.
Mark your garden boundaries:
Use stakes and string to outline the planting area. This helps create straight rows and prevents accidentally tilling areas you don’t want disturbed.
Moisten the soil:
Lightly watering the soil a day before tilling can make it easier to break up. Avoid soaking the area, as muddy soil will not till well.
Proper preparation helps the tiller work more efficiently, resulting in smoother soil.
Step 4: Begin Tilling the Soil
Once your garden area is prepared, it’s time to start tilling.
Set the tilling depth:
Most vegetables and garden plants grow best when the soil is tilled to a depth of 6 to 8 inches. This depth allows roots to grow freely while improving soil aeration.
Work methodically:
Start at one end of the garden and move across the bed in straight lines. Move slowly and steadily so the tiller can thoroughly break up the soil.
Overlap each pass:
Slightly overlap each row to ensure the entire garden area is evenly tilled.
Break up clumps:
If large soil clumps remain, run the tiller over them again or break them up with a rake.
Avoid over-tilling:
Excessive tilling can damage soil structure and disturb beneficial organisms such as earthworms and microbes. Once the soil is loose and crumbly, you’re ready to move on.
Step 5: Add Compost and Organic Matter
After tilling, it’s a great time to improve your soil’s fertility.
Spread 2 to 3 inches of compost or organic material evenly across the garden bed. Then lightly mix it into the soil using the tiller or a rake.
Adding organic matter helps:
Improve soil structure
Increase nutrient availability
Enhance moisture retention
Support beneficial soil organisms
Healthy soil leads to stronger plants and better harvests.
Step 6: Level the Garden Bed
Once the soil is tilled and enriched with compost, use a garden rake to level the surface. Smooth out uneven spots and remove any remaining rocks or debris.
A level garden bed makes planting seeds or transplanting seedlings easier and ensures water is evenly distributed throughout the soil.
At this stage, your garden is fully prepared for planting.
Tilling a garden properly creates the ideal foundation for healthy plant growth. By loosening the soil, improving drainage, and incorporating organic matter, you give your plants the best chance to thrive.
Remember that successful gardening starts with healthy soil. Taking the time to prepare your garden bed carefully can lead to stronger plants, higher yields, and a more enjoyable gardening experience throughout the growing season.