Transplanting Seedlings Outdoors: A Step-by-Step Guide for a Healthy, Thriving Garden
- By the dedicated team of editors and writers at Newsletter Station.
Gardening is one of the most rewarding ways to cultivate beauty, nourishment, and connection to the outdoors. Whether you're growing vegetables, herbs, or flowers, successfully transplanting seedlings outdoors is a critical milestone in your garden’s growth cycle.
Done correctly, transplanting strengthens plants, encourages deep root development, and sets the stage for a productive growing season. Done too quickly or without preparation, it can lead to transplant shock, stunted growth, or plant loss.
This updated guide walks you through best practices for transplanting seedlings outdoors — including timing, soil preparation, watering techniques, and ongoing plant care.
Choose the Right Time to Transplant
Timing is everything. Seedlings started indoors or in a greenhouse must be moved outside only after the danger of frost has passed, and nighttime temperatures remain consistently stable.
Check your local USDA hardiness zone and average last frost date before transplanting. Many gardening apps and cooperative extension websites now provide hyper-local planting calendars to help gardeners make informed decisions.
Cool-season crops like lettuce and broccoli can tolerate lower temperatures, while warm-season plants such as tomatoes and peppers require warmer soil and air temperatures to thrive.
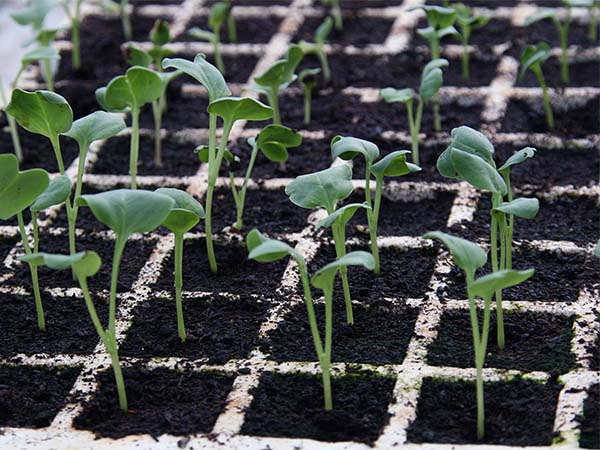
Harden Off Seedlings Properly
Seedlings grown indoors are accustomed to controlled conditions — steady temperatures, filtered light, and protection from wind. Moving them outdoors abruptly can cause transplant shock.
Hardening off is the gradual process of acclimating plants to outdoor conditions over 7–14 days:
Start with 1–2 hours outside in a sheltered, shaded location.
Gradually increase sunlight exposure and outdoor time each day.
Protect seedlings from strong winds and heavy rain during this period.
This step strengthens stems, thickens leaf tissue, and prepares plants for natural environmental fluctuations.
Prepare the Soil for Success
Healthy soil is the foundation of a thriving garden. Before transplanting:
Remove weeds, rocks, and debris.
Loosen soil to a depth of 6–8 inches to promote root expansion.
Incorporate compost or well-aged organic matter to improve drainage and nutrient availability.
Consider conducting a soil test to determine pH and nutrient levels.
Modern sustainable gardening practices emphasize building soil health rather than relying heavily on synthetic fertilizers. Strong soil biology supports long-term plant resilience.
Use Proper Transplanting Techniques
Handle seedlings gently by their leaves rather than their stems to avoid damage. Dig planting holes slightly larger than the root ball to allow roots to spread easily.
For certain plants, such as tomatoes, planting deeper than the original container depth can encourage stronger root systems. After placing the seedling in the hole:
Backfill with soil.
Lightly press to remove air pockets.
Water thoroughly to settle the soil.
Avoid compacting the soil too firmly, as this can limit root development.
Water Wisely and Apply Mulch
Consistent moisture is essential during the first few weeks after transplanting. Keep soil evenly moist but not waterlogged.
Applying a 2–3 inch layer of organic mulch around plants offers several benefits:
Retains soil moisture
Regulates soil temperature
Suppresses weeds
Reduces erosion
Mulching also supports sustainable gardening by reducing water waste and minimizing maintenance needs.
Provide Structural Support When Needed
Certain crops, including tomatoes, peppers, cucumbers, and tall flowering plants, benefit from early support. Installing stakes, cages, or trellises at transplant time prevents root disturbance later.
Providing support early promotes upright growth, better airflow, and improved fruit production.
Monitor for Stress, Pests, and Disease
The first two weeks after transplanting are critical. Watch for:
Wilting during heat stress
Yellowing leaves
Pest damage
Signs of fungal disease
Address issues quickly using integrated pest management (IPM) practices when possible. Healthy spacing and airflow reduce disease risk and support long-term plant vigor.
Gradually Increase Sun Exposure
Even after hardening off, newly transplanted seedlings can be sensitive to intense direct sunlight. If temperatures spike unexpectedly, consider temporary shade cloth or partial shade placement for a few days.
This extra protection helps prevent leaf scorch and supports steady growth.
Setting Your Garden Up for Long-Term Success
Transplanting seedlings outdoors is more than just moving plants — it’s about creating the right conditions for long-term health and productivity. By focusing on proper timing, soil preparation, moisture management, and gradual acclimation, you significantly increase your garden’s success rate.
With thoughtful planning and attentive care, your plants will transition smoothly from their sheltered beginnings to a thriving outdoor environment — rewarding you with strong growth and abundant harvests in the seasons ahead.