The Best Way to Clean Window Blinds and Keep Them Looking Like New
- By the dedicated team of editors and writers at Newsletter Station.
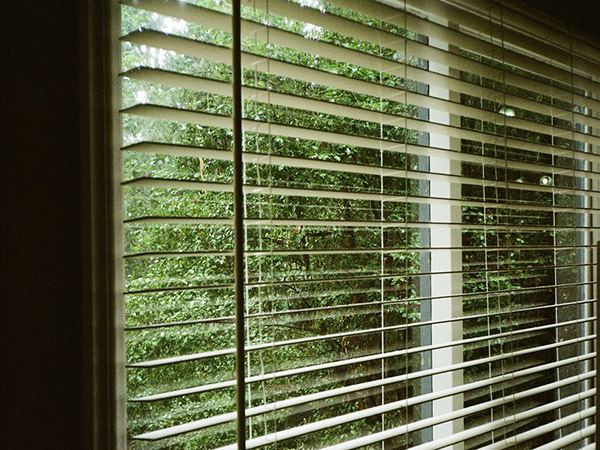
Window blinds are a practical and stylish addition to any home. They provide privacy, control natural light, and enhance the overall appearance of your living spaces. However, like many household surfaces, blinds can quickly collect dust, pet dander, pollen, grease, and other airborne particles. Without regular cleaning, this buildup can affect both the appearance of your blinds and your home's indoor air quality.
Fortunately, cleaning window blinds doesn't have to be difficult or time-consuming. With the right tools and techniques, you can keep your blinds looking fresh, extend their lifespan, and maintain a cleaner living environment.
Why Regular Blind Cleaning Matters
Many homeowners overlook blinds during routine cleaning, but they often collect significant amounts of dust and allergens. Regular maintenance offers several benefits:
Improves indoor air quality
Reduces allergens and dust accumulation
Enhances the appearance of your home
Prevents stains and discoloration
Extends the life of your blinds
Helps maintain smooth operation of moving parts
A few minutes of maintenance each week can prevent the need for extensive deep cleaning later.
Supplies You'll Need
Before you begin, gather the following cleaning supplies:
Microfiber cloth or duster
Vacuum cleaner with a brush attachment
Mild dish soap or gentle cleaning solution
Bucket or basin
Soft sponge or cloth
Warm water
Soft-bristle brush
Gloves (optional)
Wood-safe cleaner or polish for wood blinds
Having the right tools on hand will make the cleaning process faster and more effective.
Step 1: Remove Dust and Debris
The first step in cleaning any blind is removing loose dust and dirt.
For Horizontal Blinds
Fully close the blinds in one direction.
Use a microfiber duster or cloth to wipe each slat from top to bottom.
Reverse the blinds and repeat on the opposite side.
For Vertical Blinds
Dust from top to bottom using a microfiber cloth or vacuum brush attachment.
Pay special attention to the tops of the vanes where dust often accumulates.
A vacuum cleaner with a soft brush attachment can make this step even easier and help remove allergens more effectively.
Step 2: Spot Clean Stains and Sticky Residue
Over time, blinds near kitchens, dining areas, or high-traffic spaces may develop stains or sticky spots.
To clean problem areas:
Mix a few drops of mild dish soap with warm water.
Dampen a soft cloth or sponge with the solution.
Gently wipe stained areas.
Rinse the cloth frequently.
Wipe away any soap residue with a clean, damp cloth.
Avoid soaking blinds, especially those made of wood or fabric.
Step 3: Deep Clean Fabric Blinds
Fabric blinds require extra care because excessive moisture can damage certain materials.
For washable fabric blinds:
Remove them according to the manufacturer's instructions.
Follow all cleaning guidelines provided by the manufacturer.
Allow them to air dry completely before reinstalling.
For non-washable fabric blinds:
Use a fabric-safe upholstery cleaner.
Test the cleaner on a hidden area first.
Use a soft brush to remove embedded dust and debris gently.
Regular vacuuming with an upholstery attachment can help minimize the need for deep cleaning.
Step 4: Clean Wood and Faux Wood Blinds Properly
Wood and faux wood blinds add warmth and elegance to a room but require careful maintenance.
Wood Blinds
Dust regularly using a microfiber cloth.
Use a wood-safe cleaner or furniture polish when needed.
Avoid excessive moisture, which can cause warping or cracking.
Faux Wood Blinds
Wipe with a damp cloth and mild soap solution.
Dry immediately with a clean towel.
Avoid abrasive cleaners that may damage the finish.
Proper care helps preserve the appearance and durability of wood-style blinds.
Step 5: Cleaning Aluminum and Vinyl Blinds
Aluminum and vinyl blinds are among the easiest types to clean.
For routine cleaning:
Dust weekly with a microfiber cloth.
Vacuum using a brush attachment.
Wipe stains with mild soap and water.
For heavily soiled blinds:
Remove the blinds if possible.
Soak them briefly in a bathtub filled with warm water and mild detergent.
Gently wipe each slat clean.
Rinse thoroughly and allow them to dry completely before rehanging.
Take care not to bend aluminum slats during cleaning.
Step 6: Don't Forget the Hardware
While cleaning the slats, take a few moments to inspect and clean the surrounding hardware.
Wipe down:
Headrails
Cords and chains
Wands and tilt mechanisms
Mounting brackets
Removing dust from moving components can help blinds operate more smoothly and extend their lifespan.
Step 7: Establish a Regular Maintenance Routine
The easiest way to keep blinds looking their best is through consistent maintenance.
A simple schedule may include:
Weekly
Dust blinds with a microfiber cloth or vacuum attachment.
Monthly
Spot clean stains and fingerprints.
Inspect hardware and moving parts.
Seasonally
Perform a deeper cleaning based on the blind material.
Regular upkeep prevents heavy buildup and keeps cleaning tasks manageable.
Common Mistakes to Avoid
When cleaning window blinds, avoid these common mistakes:
Using harsh chemical cleaners
Applying excessive water to wood blinds
Scrubbing aggressively
Forgetting to clean both sides of the slats
Ignoring cords and hardware components
Using gentle cleaning methods helps preserve the appearance and functionality of your blinds.
Clean window blinds do more than improve the appearance of your home—they also contribute to a healthier and more comfortable living environment. By following the appropriate cleaning techniques for your specific blind material, you can remove dust, reduce allergens, and extend the life of your window treatments.
Whether you have wood, faux wood, fabric, aluminum, or vinyl blinds, regular maintenance and occasional deep cleaning will keep them looking their best. With just a little effort and the right cleaning approach, your blinds can remain an attractive feature in your home for years to come.