The Best Way to Clean Your Kitchen Sink for a Healthier Home
- By the dedicated team of editors and writers at Newsletter Station.
The kitchen sink is one of the hardest-working areas in any home. From washing dishes and rinsing produce to cleaning cookware and preparing meals, it handles countless daily tasks. Because it sees so much use, the sink can quickly become a breeding ground for bacteria, grime, grease, and unpleasant odors if not cleaned regularly.
While many homeowners focus on cleaning countertops and appliances, the sink is often overlooked. Proper sink maintenance is essential for a hygienic kitchen, helping prevent buildup and extend your sink's lifespan. Fortunately, keeping your kitchen sink clean doesn't require expensive products or complicated techniques.
This guide explains why cleaning your sink matters and provides a simple, effective routine for keeping your kitchen sink fresh, sanitary, and sparkling.
Why Cleaning Your Kitchen Sink Is Important
Helps Prevent Bacteria and Germ Buildup
Kitchen sinks can harbor bacteria from food scraps, raw meat juices, dirty dishes, and standing water. Without regular cleaning, these contaminants can accumulate and potentially spread to other kitchen surfaces.
Routine cleaning helps reduce bacteria and supports a healthier food preparation environment for your household.
Eliminates Unpleasant Odors
Food particles, grease, and residue that collect in the sink and drain can create unpleasant smells over time. Regular cleaning removes the source of these odors and helps keep your kitchen smelling fresh and clean.
Protects the Sink's Appearance
Mineral deposits, soap scum, hard water stains, and food residue can dull your sink's finish and leave unsightly marks. Consistent maintenance helps preserve its appearance and prevent long-term damage.
Extends the Lifespan of Your Sink
Proper cleaning can help prevent scratches, corrosion, staining, and deterioration, keeping your sink functional and attractive for years to come.
Supplies You'll Need
Before getting started, gather the following cleaning supplies:
Dish soap or a mild household cleaner
Baking soda
Soft sponge or microfiber cloth
Old toothbrush or small cleaning brush
White vinegar
Warm water
Microfiber towel or paper towels
Avoid using steel wool, abrasive scrubbers, or harsh chemical cleaners, as they can damage sink finishes, especially on stainless steel, porcelain, or composite materials.
Step 1: Empty and Rinse the Sink
Begin by removing all dishes, utensils, sink mats, and debris. Rinse the sink thoroughly with warm water to wash away loose food particles and surface dirt.
This simple step prepares the surface for deeper, more effective cleaning.
Step 2: Apply a Gentle Cleaner
Apply a small amount of dish soap or a mild household cleaner directly to the sink's surface.
Dish soap works particularly well because it breaks down grease and food residue without damaging most sink materials. Spread the cleaner evenly using a damp sponge or cloth.
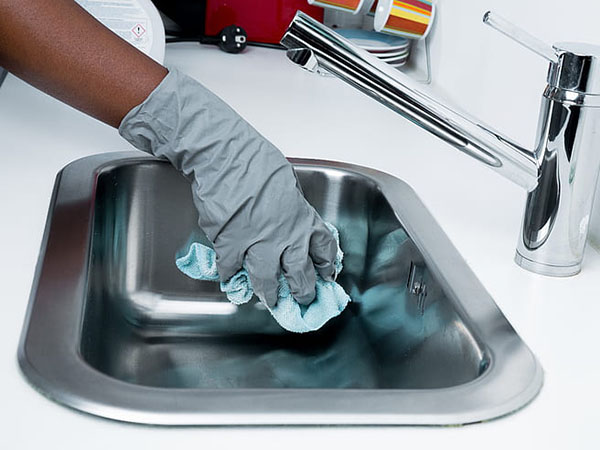
Step 3: Scrub the Entire Surface
Using a soft sponge or microfiber cloth, scrub the sink thoroughly, paying special attention to the corners, edges, and the area around the drain.
For stubborn stains or hard-to-reach areas, use an old toothbrush or small cleaning brush. These tools are excellent for cleaning around faucets, seams, and crevices where grime tends to accumulate.
Step 4: Rinse Thoroughly
After scrubbing, rinse the sink completely with warm water.
Removing all soap residue is important because leftover cleaner can attract dirt and leave a dull film on the sink's surface.
Step 5: Deodorize with Baking Soda
Sprinkle baking soda generously across the sink basin.
Baking soda is a natural deodorizer and mild abrasive that helps remove stains and neutralize odors without damaging most sink finishes.
Allow it to sit for several minutes before gently scrubbing the surface again with a damp sponge.
Rinse thoroughly with warm water.
Step 6: Disinfect and Shine with White Vinegar
Pour or spray white vinegar over the sink's surface and around the drain.
Vinegar helps dissolve mineral deposits, soap scum, and hard water buildup while providing additional cleaning power. Let it sit for a few minutes before rinsing thoroughly.
For homes with hard water, this step can help maintain a brighter, cleaner-looking sink.
Step 7: Clean the Drain
The drain is often the source of lingering kitchen odors.
Pour a small amount of baking soda down the drain, then follow with white vinegar. Allow the mixture to fizz for several minutes before flushing with hot water.
This simple method can help remove minor buildup and naturally reduce unpleasant smells.
Step 8: Dry and Buff the Surface
Use a clean microfiber towel or paper towel to dry the sink completely.
Drying prevents water spots and mineral deposits while helping maintain a polished appearance. A quick buffing also restores shine and leaves the sink looking freshly cleaned.
Additional Tips for Keeping Your Kitchen Sink Clean
To maintain a cleaner sink between deep cleanings:
Rinse the sink after washing dishes.
Avoid leaving food scraps in the basin.
Use a sink strainer to catch debris.
Wipe down the sink daily with a microfiber cloth.
Clean the drain weekly to help prevent odors.
Address stains and buildup before they become difficult to remove.
Small daily habits can significantly reduce the time and effort required for deep cleaning.
A clean kitchen sink plays an important role in maintaining a healthy, sanitary, and pleasant cooking environment. Regular cleaning helps reduce bacteria, eliminate odors, preserve the sink's appearance, and extend its lifespan.
By following a simple routine that includes washing, deodorizing, disinfecting, and drying, you can keep your sink looking its best year-round. With just a few minutes of regular maintenance, your kitchen sink can remain sparkling clean, hygienic, and ready to handle whatever your daily routine brings.