Mastering the Art of Wallpaper Removal: A Step-by-Step Guide
- By the dedicated team of editors and writers at Newsletter Station.
If you've decided to give your living space a fresh new look, removing old wallpaper is the crucial first step towards achieving that stunning transformation. At the same time, the thought of peeling off layers of stubborn wallpaper may seem daunting, but fear not!
With the right approach and patience, you can successfully rid your walls of that outdated design and create a blank canvas for your creative vision.
In this guide, we'll walk you through the step-by-step process of removing old wallpaper like a pro.
Step 1: Gather Your Supplies
Before embarking on your wallpaper removal journey, ensure you have all the necessary tools. Here's a list of items you'll need:
Wallpaper scorer: This tool creates small holes in the wallpaper, allowing the removal solution to penetrate and soften the adhesive.
Wallpaper removal solution: Commercial solutions or DIY mixtures of water and wallpaper stripper can work wonders.
Drop cloths or plastic sheets: Protect your floor and furniture from water and debris.
Stepladder: Depending on the height of your walls, a sturdy stepladder will help you access hard-to-reach areas.
Plastic spray bottle: Apply the removal solution to the wallpaper.
Wide putty knife or scraper: For gently peeling off the wallpaper once it's softened.
Sponge or scrubbing pad: To tackle residual adhesive or stubborn spots.
Warm water: For rinsing the walls after wallpaper removal.
Step 2: Prepare the Room
Start by clearing the room of any furniture, wall decor, and electrical outlet covers. Cover the floor with drop cloths or plastic sheets to catch any drips or debris. That may fall. Turn off the electricity in the room to ensure safety while working near electrical outlets.
Step 3: Test a Small Area
Before diving into the entire room, it's a good idea to test a small section of wallpaper first. Use the wallpaper scorer to create small perforations, then apply the wallpaper removal solution. Allow it to soak in for a few minutes to see how well it works and to check if the wallpaper can be removed without damaging the wall beneath.
Step 4: Score the Wallpaper
Once you've tested a small area and are ready to proceed, use the wallpaper scorer to create perforations across the entire wallpapered surface. This process ensures that the removal solution can penetrate the wallpaper effectively.
Step 5: Apply the Wallpaper Removal Solution
Fill the spray bottle with the wallpaper removal solution and liberally spray it onto the wallpaper. Work in sections, focusing on one manageable area at a time. Be patient and let the solution sit for the recommended time on the product label.
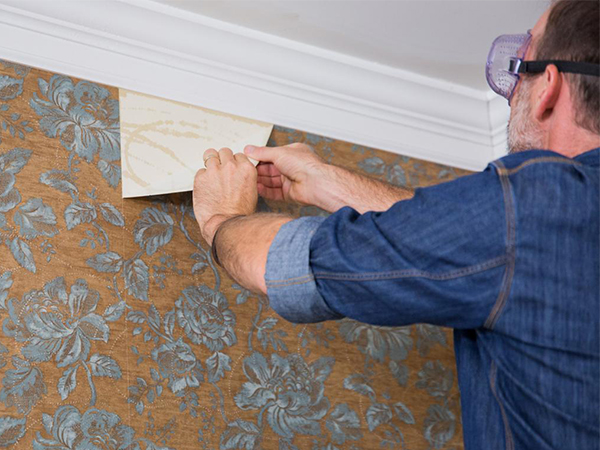
Step 6: Start Peeling
Once the wallpaper has had time to absorb the removal solution, use your putty knife or scraper to lift the edges of the wallpaper gently. Start peeling it off slowly, being careful not to damage the wall underneath. If you encounter stubborn spots, apply more removal solution and wait a bit longer before attempting to remove the wallpaper.
Step 7: Remove Residual Adhesive
After all the wallpaper has been peeled off, some adhesive residue might still be left on the walls. You can use a sponge or scrubbing pad and warm water to thoroughly clean the walls. For a particularly stubborn adhesive, you may need to repeat this step.
Step 8: Rinse and Dry the Walls
Once all the wallpaper and adhesive have been removed, rinse the walls with clean water to remove any remaining adhesive or debris. Allow the walls to dry completely before further wall treatments or paint.
Removing old wallpaper may be labor-intensive, but the results are undoubtedly rewarding. Armed with the right tools, techniques, and patience, you can master the art of wallpaper removal and create the ideal canvas for your interior design dreams.
So, roll up your sleeves, put on your DIY hat, and confidently transform your living space!