Tips for Repairing Holes in Your Wall
|
Apr 3, 2024 - By the dedicated team of editors and writers at Newsletter Station.
|
Whether from an accidental bump, a poorly placed nail, or just the normal wear and tear of daily life, holes in your walls can be a common and frustrating problem for homeowners. Fortunately, repairing these holes is a relatively straightforward task that can be accomplished with some essential tools and materials.
In this blog, we'll provide valuable tips for repairing holes in your walls so that you can restore your walls to their former glory.
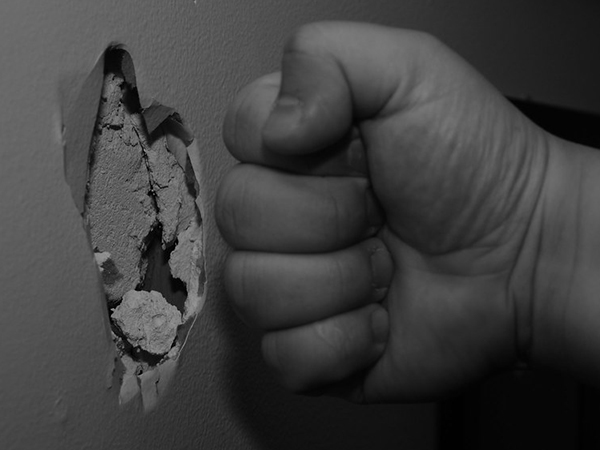
- Assess the Size of the Hole
Before you start any repair, it's important to assess the size of the hole. Holes in walls generally fall into three categories:
Small Holes: These are typically small nail holes or dents and can be easily fixed with a lightweight spackling compound.
Medium Holes: Medium-sized holes, such as those left behind by screws or anchors, may require a patching compound or a patch kit.
Large Holes: Large holes, like those resulting from accidental impacts, will need a more involved repair with a patch or drywall replacement.
- Gather the Necessary Tools and Materials
Once you've determined the size of the hole, gather the tools and materials you'll need for the repair:
Spackling compound for small holes
Patching compound or patch kit for medium holes
Joint compound and drywall patch or replacement for large holes
Putty knife or a taping knife
Sandpaper
Paint and primer that match your wall's color
Paintbrush or roller
Drop cloth or newspaper to protect your floor
- Clean and Prepare the Area
Before repairing the hole, ensure the surrounding area is clean and free from loose debris. Use a utility knife or sandpaper to remove loose or peeling paint around the hole. This will help the patch adhere better and create a smoother finish.
- Fill the Hole
For small holes, apply a small amount of spackling compound with a putty knife and smooth it over the hole. Allow it to dry according to the manufacturer's instructions, and then sand it smooth. For medium holes, follow the instructions on your patch kit or use a patching compound, spreading it evenly over the hole with a putty knife. Again, let it dry and sand it smooth.
- Patch or Replace Drywall for Large Holes
For large holes, you may need to cut a piece of drywall to fit the hole or use a pre-made drywall patch. Secure the patch in place with screws or nails, and then apply joint compound to create a smooth finish. Be sure to feather the edges of the compound so that it blends seamlessly with the surrounding wall. Sand the patched area when it's dry to achieve a smooth surface.
- Prime and Paint
After the patch has dried and is smooth, it's time to prime and paint the repaired area to match the rest of the wall. Use a paintbrush or roller and feather the paint into the surrounding wall for a seamless finish. Allow the paint to dry completely before evaluating if additional coats are needed.
- Clean Up
Once your repaired wall looks as good as new, clean your tools and dispose of any used materials properly. According to local regulations, dispose of any waste, such as sanding dust and empty containers.
Repairing holes in your wall is a manageable DIY task that can save you money and improve the appearance of your home. By assessing the size of the hole, gathering the necessary tools and materials, and following these tips, you can achieve a professional-looking repair that seamlessly blends into your existing wall.
Don't let unsightly holes detract from the beauty of your home; instead, take the initiative to repair them and enjoy your newly restored walls.
Unlock the Power of Email Marketing
Harness the potential of email marketing with Newsletter Station. Reach your target audience, drive conversions, and achieve your business goals.
|
More Blogs
| May 1, 2024 |
Common Electrical Problems in a Home and How to Fix Them
|
| Apr 24, 2024 |
The Price of Procrastination: How Neglecting Home Maintenance Can Lead to Costly Repairs
|
| Apr 17, 2024 |
Essential Tools Every Homeowner Should Have
|
| Apr 10, 2024 |
Enhancing Sustainability: Energy Efficient Home Upgrades to Consider
|
| Apr 3, 2024 |
Tips for Repairing Holes in Your Wall
|
| Mar 27, 2024 |
Why You Shouldn't Delay Major Home Repairs
|
| Mar 20, 2024 |
Projects that Will Increase Your Home's Value
|
| Mar 13, 2024 |
Professionals That You Need for a Well-Maintained Home
|
| Mar 6, 2024 |
The Best Home Renovations When You Are On a Budget
|
| Feb 28, 2024 |
Strategies to Ensure that Your Home Remodeling Project Goes Smoothly
|
| Feb 21, 2024 |
Home Projects that You Should Never DIY
|
| Feb 14, 2024 |
The Most Common Bathroom Plumbing Mistakes
|
|
|