
FEATURE ARTICLE
How to Clean Your Bathroom Exhaust Fan for Better Air Quality
May 20, 2026
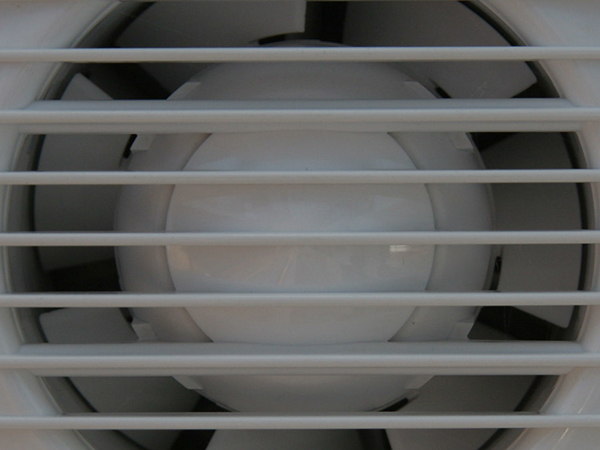
Cleaning your bathroom exhaust fan may not be the most exciting household chore, but it plays an important role in maintaining a clean, healthy, and comfortable bathroom environment. Over time, dust, dirt, moisture, and debris can accumulate inside the fan, reducing airflow and forcing the unit to work harder than necessary.
A dirty bathroom exhaust fan can contribute to excess humidity, lingering odors, mold growth, and even higher energy use. Regular cleaning helps improve ventilation, supports better indoor air quality, and can extend the fan's lifespan.
The good news is that cleaning a bathroom exhaust fan is a relatively simple maintenance task that most homeowners can complete in less than an hour with a few basic supplies.
Why Cleaning Your Bathroom Exhaust Fan Matters
Bathroom exhaust fans help remove:
Safety First
Before cleaning your bathroom exhaust fan, always prioritize safety.
Important Safety Steps:
Gather Your Cleaning Supplies
You don’t need expensive products to clean your bathroom exhaust fan effectively. Most homeowners already have the necessary supplies on hand.
Recommended Cleaning Supplies:
Step 1: Remove the Fan Cover
Most bathroom exhaust fan covers are attached with spring clips or screws.
To Remove the Cover:
Step 2: Clean the Fan Cover
The cover often collects a large amount of dust and grime over time.
Cleaning Tips:
Step 3: Vacuum Dust and Debris
Using a vacuum cleaner with a brush attachment, carefully remove loose dust and dirt from:
Be gentle around electrical components to avoid damaging the fan.
Step 4: Clean the Fan Blades and Motor Area
Dust buildup on the fan blades can reduce airflow and create unnecessary noise during operation.
To Clean the Blades:
If the motor area appears excessively dirty or damaged, consider contacting a professional for inspection or servicing.
Step 5: Wipe Down the Housing
Use a damp microfiber cloth to clean the inside of the fan housing and surrounding surfaces.
This helps remove:
Step 6: Reassemble the Fan
Once everything is clean and dry:
Step 7: Test the Fan
Turn the fan back on and check for:
How Often Should You Clean Your Bathroom Exhaust Fan?
Most experts recommend cleaning your bathroom exhaust fan every six months. However, you may need more frequent cleaning if:
Additional Tips to Improve Bathroom Ventilation
Along with regular fan cleaning, these habits can help maintain better bathroom air quality:
Cleaning your bathroom exhaust fan is a simple but important home maintenance task that can improve air quality, reduce moisture buildup, and extend the life of your ventilation system. With regular care, your fan can operate more efficiently, quietly, and effectively.
By incorporating bathroom exhaust fan cleaning into your regular household routine, you can help prevent mold growth, eliminate lingering odors, and create a fresher, healthier bathroom environment.
A dirty bathroom exhaust fan can contribute to excess humidity, lingering odors, mold growth, and even higher energy use. Regular cleaning helps improve ventilation, supports better indoor air quality, and can extend the fan's lifespan.
The good news is that cleaning a bathroom exhaust fan is a relatively simple maintenance task that most homeowners can complete in less than an hour with a few basic supplies.
Why Cleaning Your Bathroom Exhaust Fan Matters
Bathroom exhaust fans help remove:
- Moisture and humidity
- Odors
- Airborne particles
- Steam from showers and baths
- Mold and mildew growth
- Peeling paint or wallpaper
- Excess moisture damage
- Unpleasant odors
- Reduced fan efficiency
- Increased noise during operation
Safety First
Before cleaning your bathroom exhaust fan, always prioritize safety.
Important Safety Steps:
- Turn off power to the fan at the circuit breaker
- Allow the fan to cool completely if recently used
- Wear gloves, safety glasses, and a dust mask if needed
- Use a stable ladder or step stool
Gather Your Cleaning Supplies
You don’t need expensive products to clean your bathroom exhaust fan effectively. Most homeowners already have the necessary supplies on hand.
Recommended Cleaning Supplies:
- Step stool or ladder
- Screwdriver
- Vacuum cleaner with brush attachment
- Microfiber cloth or soft sponge
- Soft-bristle brush or old toothbrush
- Mild dish soap
- Warm water
- Vinegar and water solution for stubborn grime
- Compressed air (optional)
Step 1: Remove the Fan Cover
Most bathroom exhaust fan covers are attached with spring clips or screws.
To Remove the Cover:
- Carefully pull the cover downward.
- If spring clips are attached, gently squeeze them to release the cover.
- Place the cover on a flat surface for cleaning.
Step 2: Clean the Fan Cover
The cover often collects a large amount of dust and grime over time.
Cleaning Tips:
- Wash the cover in warm, soapy water
- Use a soft brush to remove stubborn buildup
- Rinse thoroughly
- Allow it to dry completely before reinstalling
Step 3: Vacuum Dust and Debris
Using a vacuum cleaner with a brush attachment, carefully remove loose dust and dirt from:
- Fan blades
- Motor housing
- Vent openings
- Surrounding ceiling area
Be gentle around electrical components to avoid damaging the fan.
Step 4: Clean the Fan Blades and Motor Area
Dust buildup on the fan blades can reduce airflow and create unnecessary noise during operation.
To Clean the Blades:
- Use a soft cloth or brush to wipe away dirt
- Dampen the cloth slightly if needed
- Avoid soaking electrical parts with water
If the motor area appears excessively dirty or damaged, consider contacting a professional for inspection or servicing.
Step 5: Wipe Down the Housing
Use a damp microfiber cloth to clean the inside of the fan housing and surrounding surfaces.
This helps remove:
- Dust
- Grime
- Moisture residue
- Potential mold buildup
Step 6: Reassemble the Fan
Once everything is clean and dry:
- Reattach the fan cover securely
- Ensure clips or screws are properly fastened
- Restore power at the circuit breaker
Step 7: Test the Fan
Turn the fan back on and check for:
- Smooth airflow
- Reduced noise
- Proper ventilation
- Improved performance
How Often Should You Clean Your Bathroom Exhaust Fan?
Most experts recommend cleaning your bathroom exhaust fan every six months. However, you may need more frequent cleaning if:
- Your bathroom lacks windows
- The fan runs daily
- You notice excess moisture
- Dust accumulates quickly
- The fan becomes noisy
Additional Tips to Improve Bathroom Ventilation
Along with regular fan cleaning, these habits can help maintain better bathroom air quality:
- Run the fan during and after showers
- Leave the fan on for 15–20 minutes after bathing
- Keep air vents unobstructed
- Open windows when possible
- Address plumbing leaks quickly
Cleaning your bathroom exhaust fan is a simple but important home maintenance task that can improve air quality, reduce moisture buildup, and extend the life of your ventilation system. With regular care, your fan can operate more efficiently, quietly, and effectively.
By incorporating bathroom exhaust fan cleaning into your regular household routine, you can help prevent mold growth, eliminate lingering odors, and create a fresher, healthier bathroom environment.