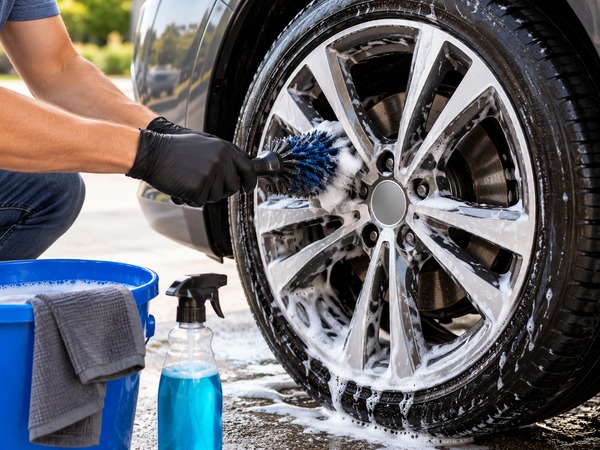
Clean wheels can make an otherwise ordinary car wash look dramatically better. Unfortunately, wheels are also exposed to some of the toughest contaminants on a vehicle: brake dust, road grime, salt, tar and dirt kicked up from the pavement.
Leave that buildup in place long enough and it becomes increasingly difficult to remove. Brake dust can be particularly stubborn, and winter road treatments can be hard on wheel finishes if they're allowed to accumulate.
The challenge is cleaning effectively without damaging the finish. Today's wheels may be clear-coated, painted, powder-coated, polished, chrome-plated or finished in other specialty materials, and a cleaner that's acceptable for one isn't necessarily appropriate for another.
Before trying any wheel-cleaning method, know what you're working with. If you're unsure, start with the gentlest option.
- Start With Car-Wash Soap and Water
For wheels that are cleaned regularly, you may not need a specialized chemical at all.
Begin by thoroughly rinsing each wheel to remove loose sand, dirt and grit. Then use a quality automotive wash soap mixed according to the manufacturer's directions.
Use a soft wheel brush or microfiber wash mitt to clean the wheel face, spokes and accessible areas around the lug nuts.
Don't forget the inner barrel. This is where a surprising amount of brake dust and road grime collects. A long, appropriately sized wheel brush can make the area much easier to reach.
Most importantly, use tools dedicated to your wheels.
A mitt or towel that's been used on a dirty wheel shouldn't go directly onto the vehicle's paint. Brake dust and road grit can become trapped in the material and potentially scratch painted surfaces.
When you're finished, rinse thoroughly so no soap remains in seams or around lug nuts.
- Use a Dedicated Wheel Cleaner for Brake Dust
If soap and water aren't enough, move up to a purpose-made automotive wheel cleaner.
These products are designed to loosen brake dust and road contamination so less aggressive scrubbing is required.
But don't assume a bottle labeled "wheel cleaner" is appropriate for every wheel.
Read the product label carefully and make sure the cleaner is compatible with your particular finish. This is especially important with polished or bare aluminum, anodized surfaces, matte finishes and aftermarket wheels.
Whenever you're using a product for the first time, testing it in a small, inconspicuous area is sensible.
Apply the cleaner according to its instructions and observe the recommended dwell time. Allowing a product to work longer than directed isn't necessarily more effective and may increase the chance of staining or damaging a sensitive finish.
Never let the cleaner dry on the wheel.
Agitate stubborn areas with an appropriate brush and rinse thoroughly.
- Use an Iron Remover for Embedded Brake Dust
Some brake dust doesn't simply sit on top of the wheel. Tiny iron-containing particles can become stubbornly attached to the surface.
That's where an automotive iron remover can be useful.
These products chemically react with iron contamination, helping loosen particles that ordinary car-wash soap may leave behind. Many change color as they react, although the exact behavior depends on the product.
Follow the manufacturer's directions carefully.
Not every iron remover is suitable for every surface, and the product shouldn't be allowed to dry on the wheel.
Also don't mistake the dramatic color-changing reaction for a reason to use an iron remover every time you wash the car. If your wheels come clean easily with ordinary soap, there's no need to introduce a stronger chemical simply because it's available.
Use the least aggressive product that gets the job done.
- Remove Tar and Adhesive Contamination With the Right Product
Black specks that refuse to come off with normal washing may not be brake dust at all.
Road tar, asphalt residue and adhesive contamination can stick tightly to wheels, particularly behind the spokes and along the inner barrel.
Scrubbing harder isn't always the answer.
A wheel-safe automotive tar or adhesive remover may dissolve the contamination with less mechanical abrasion. Check the label for compatibility with your wheel finish, apply it only where necessary and follow the specified dwell and rinsing instructions.
Avoid reaching automatically for household solvents.
Products that weren't designed for automotive finishes can stain, dull or otherwise damage coatings, and the risk may not be obvious until after the wheel has dried.
- Use Automotive Detailing Clay for Bonded Contaminants
If a wheel is clean but still feels rough, bonded contamination may remain on the surface.
Automotive detailing clay can sometimes remove material that normal washing leaves behind.
Start with a thoroughly washed wheel. Apply an appropriate clay lubricant, then gently glide the clay over the contaminated area rather than rubbing aggressively.
If the clay becomes heavily soiled, fold it to expose a clean surface. If it falls on the ground, discard it rather than putting it back on the wheel where it could pick up abrasive debris.
One important caution: don't automatically clay matte or textured finishes. Clay is most appropriate on smooth surfaces where the product manufacturer and wheel-finish recommendations allow it.
For heavily contaminated or expensive specialty wheels, professional detailing may be safer than experimenting.
- Clean Tight Areas With Wheel-Specific Brushes
Sometimes the cleaning product isn't the problem—the tool is.
Modern wheel designs can have narrow openings, intricate spokes and deep barrels that are almost impossible to clean properly with a sponge.
A few purpose-built tools can make a significant difference:
A soft wheel-face brush for broad surfaces
A narrow detailing brush for lug nuts and crevices
A long barrel brush for reaching behind spokes
Microfiber towels reserved exclusively for wheels
Brush softness matters.
Aggressive brushes and abrasive pads can scratch clear coat, polished surfaces and other delicate finishes. Even if a scratch isn't immediately obvious while the wheel is wet, it may become much more noticeable in direct sunlight.
There's rarely a reason to attack a wheel with the harshest brush available.
Let the cleaner loosen the contamination and use gentle agitation to finish the job.
- Protect the Wheels After They're Clean
Once you've done the hard work, adding protection can make the next wash easier.
Depending on the wheel finish, options include wheel-specific sealants and ceramic coatings designed to withstand the conditions wheels experience.
These products don't stop brake dust from being produced, and they don't make wheels maintenance-free. Instead, they can make contamination less likely to bond as stubbornly to the protected surface.
That means future cleaning may require less aggressive scrubbing.
Preparation matters, particularly with ceramic coatings. The wheel generally needs to be thoroughly cleaned and prepared before application. Applying a coating over embedded contamination won't magically create a perfect finish—it may simply seal in what was already there.
DIY ceramic wheel products are available, but professional application may make sense for expensive wheels or when long-term durability is the priority.
What About Baking Soda, Vinegar and Aluminum Foil?
You'll find plenty of wheel-cleaning advice online recommending household products.
Baking soda paste is often suggested as a mild abrasive. Vinegar is recommended for mineral deposits. Aluminum foil is sometimes promoted as a way to remove rust from chrome.
The problem is that modern "rims" aren't one universal material.
A technique that may appear to work on one chrome surface could scratch, etch or dull a painted, clear-coated, polished, anodized or specialty wheel.
Vinegar is acidic. Baking soda is abrasive. Aluminum foil creates direct mechanical abrasion.
That doesn't make these substances inherently bad—it makes them poor universal recommendations for expensive automotive finishes.
A wheel-safe automotive product specifically approved for your finish is generally the better choice.
Always Work on Cool Wheels
Don't start cleaning immediately after a long drive or hard braking.
Wheels and brake components can become hot. Applying cleaning chemicals to a hot surface can cause the product to dry too quickly, potentially leaving streaks or spots and reducing the time you have to rinse it away.
Park the vehicle in a shaded area when possible and allow the wheels to cool before beginning.
Shade also helps prevent water and cleaning products from evaporating too quickly while you're working.
Clean One Wheel at a Time
When using a dedicated wheel cleaner, working one wheel at a time is often the safest approach.
Rinse the wheel, apply the product, allow the recommended dwell time, agitate as necessary and rinse thoroughly before moving on.
Spraying all four wheels and then returning to the first may allow the product to dry—particularly on a warm or breezy day.
Follow the product instructions if they recommend a different procedure.
How Often Should You Clean Your Wheels?
There's no universal two- or three-week rule.
A vehicle driven daily in stop-and-go traffic may accumulate brake dust much faster than a lightly driven weekend car. Winter conditions can also require more frequent rinsing because of road salt and other deicing materials.
Instead of relying entirely on the calendar, look at the wheels.
Clean them before contamination becomes thick and difficult to remove.
Frequent gentle cleaning is generally preferable to allowing months of buildup and then resorting to aggressive chemicals and heavy scrubbing.
During winter, rinsing away salt and road grime between complete washes can also be worthwhile.
Don't Forget the Tires
If you're already cleaning the wheels, it's a good opportunity to clean the tires as well—but use products and tools designed for that job.
A tire brush can be more aggressive than the brush you'd want touching a delicate wheel finish, which is another reason to keep your detailing tools separate.
After cleaning, rinse thoroughly and allow the area to dry before applying any tire dressing or wheel-protection product.
Avoid applying slippery dressings to the tire tread.
Common Wheel-Cleaning Mistakes
Most wheel damage doesn't happen because someone failed to scrub hard enough. It happens because the cleaning method was too aggressive or inappropriate for the finish.
Avoid using an unknown cleaner simply because it promises fast results. Don't allow chemicals to dry on the wheel, and don't assume that more dwell time means more cleaning power.
Skip abrasive household pads, stiff metal brushes and unverified DIY chemical combinations.
Pressure washers can be useful for rinsing, but don't place the nozzle extremely close to the wheel or direct high-pressure water unnecessarily at vulnerable areas.
And if a wheel has peeling clear coat, corrosion, curb damage or another compromised finish, be especially cautious. Cleaning won't repair damaged coating, and aggressive treatment can make the problem more noticeable.
A Simple Routine Is Usually the Best Routine
Keeping car rims clean doesn't require a shelf full of detailing chemicals.
For regular maintenance, start with cool wheels, a thorough rinse, automotive wash soap and dedicated wheel brushes. Step up to a compatible wheel cleaner, iron remover or tar remover only when the contamination calls for it.
Then protect the finish if appropriate and clean the wheels regularly enough that brake dust and road grime don't have months to accumulate.
The key is matching the cleaning method to the wheel.
A little knowledge about your wheel finish—and a willingness to start gently—can produce better results than the most aggressive cleaner in the garage, while helping your wheels continue to look their best.